

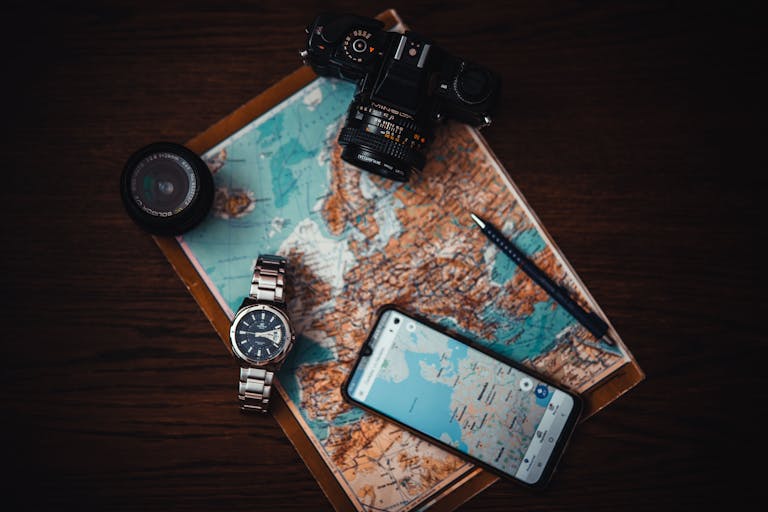
Everest Base Camp Trek Cost for Beginners: A Simple Guide
Embarking on the Everest Base Camp trek is a thrilling adventure, but let’s talk about the part everyone wonders about—what it’s going to cost. If you’re a first-time trekker, understanding the expenses upfront can save you from any nasty surprises. Let’s break it all down so you can plan your budget wisely and focus on the exciting journey ahead!
How Much Does Everest Base Camp Cost?
1. Permits and Fees: Your Ticket to Adventure

Before you even set foot on the trail, there are a couple of permits you’ll need. The Sagarmatha National Park Entry Permit is non-negotiable and costs around NPR 3000, while the Khumbu Pasang Lhamu Rural Municipality Permit will set you back about NPR 3000 too. These permits help maintain the trails and ensure conservation efforts in the region.
Altogether, permit costs can add up to about $50, so budget for this first step before dreaming about reaching Base Camp!
2.Flights to Lukla: The Cost of Convenience
The flight from Kathmandu to Lukla is often dubbed one of the most scenic (and hair-raising) flights in the world. It’s also one of the pricier elements of your Everest Base Camp trek cost. Round-trip flights typically cost between $350 to $400 for foreigners. Yes, it’s a bit steep, but it saves you days of walking to reach the starting point of the trek.
For those on a tighter budget or looking to skip the thrill of Lukla’s short runway, you could trek to the starting point from Salleri. However, this adds 2–3 extra days to your journey, includes off road drive, and incurs additional expenses for food and accommodation. Sometimes, convenience is worth the price!
3. Accommodation: Tea Houses on a Budget
Staying in tea houses along the trail is part of the charm of trekking in Nepal. These cozy lodges are surprisingly affordable at lower elevations, with nightly rates ranging from $5 to $10 for a basic room. As you climb higher and the trails become more remote, prices can increase to around $20 per night.
4. Food and Drinks: Fueling Your Adventure
You’re going to burn a lot of calories on the trail, which means you’ll need to keep fueling up. Meals on the trek usually cost $5 to $8 (per meal) at lower elevations and $8 to $12 higher up. Dal bhat (a hearty meal of lentils, rice, and veggies) is a trekker’s best friend, offering unlimited refills at many tea houses!
Drinks, on the other hand, can get surprisingly expensive. A bottle of water that costs $0.50 in Kathmandu can go up to $4 at higher altitudes. You can save a ton by bringing a reusable water bottle and purification tablets. If you’re a coffee or tea lover, budget an extra $2 to $4 per drink—staying warm while sipping ginger tea is part of the experience.
5. Guides and Porters: A Helping Hand on the Trail
Hiring a guide or porter isn’t mandatory, but it’s a fantastic way to enrich your trek. Guides cost around $30 to $40 per day, while porters, who carry your heavy gear, charge about $20 to $30 daily. If you’re trekking solo or worried about altitude sickness, having a guide can be a literal lifesaver. Plus, supporting local workers is a meaningful way to give back to the community.
For first-timers, a guided trek package might feel like an easier option. These packages typically range from $1,200 to $1,500, covering everything from permits to accommodation. While it’s a bigger upfront cost, it simplifies your trip significantly.
6. Miscellaneous Costs: The Extras That Add Up
Don’t forget the little things—they can sneak up on you! Charging your phone or camera costs around $2 to $5 per device at higher altitudes. Hot showers? Luxurious but pricey, often costing $5 to $10. And if you’re planning to use Wi-Fi to stay connected, prepare to shell out $5 to $10 for a Wi-Fi card.
Souvenirs are another thing to budget for. From prayer flags to yak wool scarves, it’s tempting to bring a piece of Nepal home. Just remember to leave room in your budget for these unique mementos.
How To Benifit From Affordable Gears To Reduce Everest Base Camp Trek Cost
If you’re planning your first trek to Everest Base Camp, figuring out what gear you need can feel overwhelming. But don’t worry! You don’t need to spend a fortune to gear up for this adventure. With some smart shopping and prioritizing, you can stick to your budget and still have everything you need for a comfortable and safe trek. Let’s break it down into the essentials!
1. Clothing Layers: The Secret to Staying Comfortable
When it comes to trekking in the Himalayas, layering is key. You’ll need clothes that can handle everything from freezing mornings to sunny afternoons. Start with a moisture-wicking base layer to keep sweat off your skin. These are inexpensive and widely available—no need to go for the priciest brands!
Next, invest in a good fleece or down jacket. You can find budget-friendly options from local brands in Kathmandu, which are often just as effective as the big-name alternatives. For your outer layer, a waterproof and windproof jacket is a must. The weather in the mountains can change faster than you can say “Everest Base Camp trek cost.”
Don’t forget about your legs! A pair of thermal base layer pants, lightweight trekking pants, and waterproof outer pants should cover all conditions. You don’t need five different pairs—two of each should suffice, and you can always wash them along the trail.
2. Trekking Boots: Your Best Friend on the Trail
Your boots will make or break your trek, so choose wisely. The good news is you don’t need to spend hundreds of dollars on the most expensive pair out there. Look for sturdy, mid-range trekking boots with good ankle support and a reliable grip. It’s even better if they’re waterproof—there’s nothing worse than wet feet at 12,000 feet.
Here’s a tip: break in your boots before the trek! Wear them on smaller hikes or even around the house to avoid painful blisters. If you’re on a budget, you can sometimes find lightly used boots in excellent condition at second-hand stores or rental shops in Kathmandu.
3. Backpacks: Lightweight and Functional
A comfortable backpack is essential for carrying your gear, but don’t let the fancy ones with endless features fool you. For Everest Base Camp, a 50- to 60-liter backpack is the perfect size. Look for one with adjustable straps, a padded hip belt, and a rain cover—nothing fancy, just practical.
If you’re hiring a porter, you’ll only need a smaller daypack for items like water, snacks, and an extra layer. For the porters to carry your remaining weights, you can bring a 50/60 liter duffel bag.
4. Sleeping Bag: Stay Warm Without Breaking the Bank
A warm sleeping bag is non-negotiable, especially as temperatures can drop below freezing at higher altitudes. While high-end bags can cost a small fortune, there are budget-friendly options available that still do the job. In Kathmandu, you’ll find plenty of shops where you can rent or buy a good sleeping bag rated for -20°C.
Pro tip: Bring a sleeping bag liner. It’s lightweight, inexpensive, and adds an extra layer of warmth. Plus, it’s easier to wash than the bag itself, keeping things fresh during your trek.
5. Accessories: The Little Things That Matter
Small items can make a big difference on the trail. Trekking poles, for instance, are a lifesaver for your knees on those steep descents. You don’t need fancy ones; any sturdy, adjustable poles will do.
Headlamps are another must-have, especially for those early-morning starts. A simple, affordable headlamp with extra batteries is all you need. You’ll also want a reusable water bottle and purification tablets to save on bottled water costs—and they’re better for the environment!
Other essentials include a sun hat, sunglasses with UV protection, gloves, and a buff or scarf to protect your face from the wind. None of these items need to be expensive, and you’ll find plenty of affordable options in Kathmandu’s trekking shops.
6. Where to Save and Where to Splurge
While it’s tempting to go all out on gear, you don’t have to splurge on everything. Focus on items that directly impact your comfort and safety, like boots and outer layers. For less critical items like buffs or trekking poles, budget-friendly options work just fine.
Kathmandu is a treasure trove for trekkers on a budget. Many shops offer high-quality, locally made gear at a fraction of the cost of international brands. Just make sure to test everything before you buy or rent—nothing’s worse than realizing your jacket’s zipper doesn’t work halfway through the trek!
Choosing the Right Trek Package: Budget or Standard?
When planning your Everest Base Camp trek, one big question looms: what type of trek package should you choose? Should you save big with a budget trek, go for the comfort of a standard package, or treat yourself to the luxury route? The answer depends on your budget, preferences, and how you picture your Himalayan adventure. Let’s explore your options so you can make the best choice!
1. Budget Trek Packages: Adventure on a Shoestring
If you’re watching your wallet, a budget trek package is a fantastic way to experience the Everest Base Camp trek without spending a fortune. These packages typically cost anywhere between $1,000 to $1,300 and include all the basics—permits, accommodation in tea houses, and supporting crew.
With a budget trek, you’ll still get stunning views of Everest and the satisfaction of reaching Base Camp. However, don’t expect any frills. Accommodations will be basic, both in Kathmandu and in the mountains with shared bathrooms.
Budget treks are perfect for those who don’t mind a little roughing it and want to focus on the adventure rather than the amenities. Plus, keeping costs down lets you allocate more to souvenirs or post-trek indulgences in Kathmandu!
2. Standard Trek Packages: Balance and Comfort
For many trekkers, a standard trek package hits the sweet spot between affordability and comfort. These packages usually range from $1,500 to $2,000 and offer a well-rounded experience. You’ll get private or twin-sharing rooms in tea houses, three meals a day, and the services of a dedicated guide and porter.
Standard packages often include a few added conveniences, such as airport transfers and pre-arranged flights to Lukla. This means you can relax and focus on enjoying the trek rather than stressing about logistics.
If you’re trekking for the first time or prefer not to skimp on comfort, a standard package is a great choice. It gives you the support and convenience you need without breaking the bank.
4. How to Choose the Right Package for You
Now that you know your options, how do you decide which one suits you best? Start by considering your budget and priorities. If you’re on a tight budget and don’t mind basic accommodations, the budget package is your best bet. For those looking for a balance of cost and comfort, the standard package offers great value without cutting corners.
Also, consider your trekking experience. Beginners might feel more secure with a guide and porter included, which the standard package provides. Experienced trekkers, meanwhile, might prefer the independence of a budget trek.
Avoiding Common Beginner Mistakes: Save Time and Money
If you’re gearing up for the Everest Base Camp trek, congratulations! It’s going to be the adventure of a lifetime. But, as exciting as it is, beginners often make a few avoidable mistakes that can cost time, money, and even some sanity. Don’t worry—I’ve got you covered. With a little planning and the right mindset, you’ll sidestep these common pitfalls and enjoy a smoother trek to Base Camp.
1. Overpacking: Carrying More Than You Need
One of the biggest mistakes beginners make is overpacking. It’s tempting to prepare for every “what if” scenario, but remember, every extra pound in your backpack adds up when you’re trekking for hours at high altitude.
Stick to the essentials—warm layers, comfortable trekking gear, basic toiletries, and snacks. If you’re hiring a porter, keep their load light too. They’ll thank you, and you’ll have a happier trek. Not sure what to bring? Focus on quality over quantity. Investing in lightweight, multipurpose items can save you space and money in the long run.
Pro tip: Leave room in your bag for snacks and water. You’ll burn a ton of calories on the trail, and staying fueled is key to enjoying the trek.
2. Skipping Altitude Acclimatization Days
Altitude sickness doesn’t care how fit you are, and rushing through the trek is a sure way to invite trouble. Beginners often underestimate the importance of acclimatization days, thinking they can push through to save time. Trust me, that’s a bad idea.
Acclimatization days are built into most itineraries for a reason—they give your body time to adjust to the thinner air. Skipping these can lead to headaches, nausea, and even more serious health issues. Besides, these rest days are a great opportunity to explore villages like Namche Bazaar and Dingboche, soak in the views, and chat with fellow trekkers.
Remember: slow and steady wins the race, especially when it comes to high-altitude trekking.
3. Underestimating the Costs of the Trek
Many first-timers dive into the trek without fully understanding the Everest Base Camp trek cost. Sure, the initial package price or budget seems affordable, but hidden expenses can creep up. Meals, water, charging electronics, and even Wi-Fi get pricier as you ascend.
For instance, a bottle of water that costs $0.50 in Kathmandu can set you back $4 or more in Gorakshep. You can save money by bringing a reusable water bottle and purification tablets or a filter. Similarly, charging your phone or camera might cost $2 to $5 per hour at higher altitudes, so bring a power bank to cut down on expenses.
Budgeting carefully and being prepared for these costs can save you from unnecessary stress—and overspending.
4. Neglecting Physical Preparation
You don’t need to be an Olympic athlete to complete the Everest Base Camp trek, but showing up unprepared physically is a mistake you’ll regret. Trekking at high altitudes is no joke, and the trail includes steep ascents, rocky paths, and long days of walking.
Start preparing a few months before your trek with regular cardio, strength training, and practice hikes. This doesn’t just make the trek easier—it also makes it more enjoyable. Being fit means you’ll spend less time huffing and puffing and more time soaking in the stunning Himalayan views.
Click the link to get an idea on the training plan.
Pro tip: Break in your trekking boots during your training hikes. New boots on a long trek = guaranteed blisters.
5. Not Researching Your Trekking Company
If you’re booking a guided trek, don’t just choose the cheapest company without doing your homework. Low-cost options might skimp on safety, experienced guides, or proper equipment, which can put your trek (and your well-being) at risk.
Look for companies with good reviews, transparent pricing, and experienced staff. A slightly higher initial investment can save you money in the long run by avoiding unexpected fees or subpar services. After all, you’re trusting them to guide you safely to Base Camp and back.
6. Skipping Travel Insurance
No one wants to think about emergencies on their dream trek, but stuff happens—flight delays, injuries, or altitude-related issues. Skipping travel insurance is a rookie mistake that could cost you big.
Make sure your insurance covers high-altitude trekking (some policies don’t) and emergency helicopter evacuations. It’s better to have it and not need it than to need it and not have it. Consider it an essential part of your Everest Base Camp trek cost.
7. Ignoring Weather Reports
The Himalayas are unpredictable, and the weather can change in the blink of an eye. Beginners sometimes forget to check forecasts or pack for sudden weather shifts. A sunny morning can turn into a snowy afternoon, so always be prepared.
Bring a reliable waterproof jacket, gloves, and extra layers, even if the forecast looks clear. You’ll thank yourself when you’re warm and dry while others are shivering in their cotton hoodies.
-
Everest Base Camp Trek Cost for Beginners: A Simple Guide
Embarking on the Everest Base Camp trek is a thrilling adventure, but let’s talk about the part everyone wonders about—what it’s going to cost. If you’re a first-time trekker, understanding the expenses upfront can save you from any nasty surprises. Let’s break it all down so you can plan your budget wisely and focus on […]
-
Altitude Sickness: What Every Trekker Should Know
Signs and Symptoms: How to Recognize Altitude Sickness Early If you’re planning to trek in Nepal’s breathtaking mountains, one thing you don’t want to ignore is altitude sickness. This sneaky condition can turn your dream trek into a bit of a nightmare if you’re not prepared. But don’t worry—it’s easier to recognize than you think! […]
-
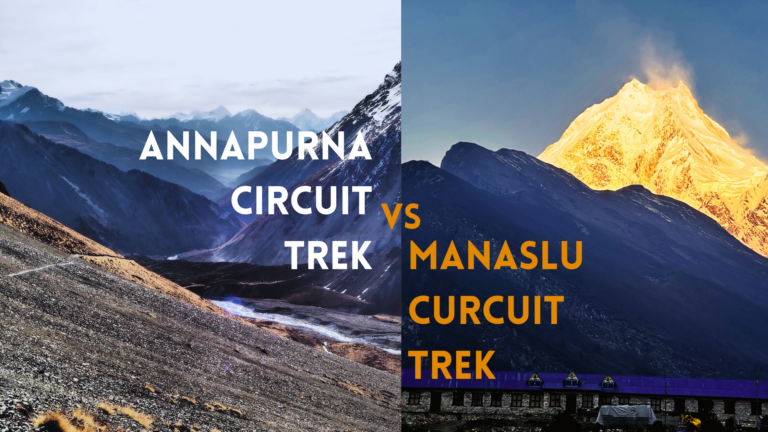
Manaslu Circuit Trek Vs Annapurna Ciruit Trek
Differences and Similarities between Annapurna Circut Trek and Manaslu Circuit Tek When it comes to trekking in Nepal, you might come across a galaxy of choices. With towering peaks standing to its northern highlands, including eight of the world’s fourteen peaks over 8,000 meters, Nepal boasts a wide range of trekking routes that not only […]
-
7 Beginner-Friendly Trekkings in Nepal
The trekking routes flourished under the soaring peaks in the northern skyline have become the first choice for many hard core hikers and trekkers. But because of Nepal’s diverse topography and terrain, it also generoursly offer beginner-friendly trekking options. First time trekking in Nepal? Keep calm and buy the flight tickets as we have […]
-
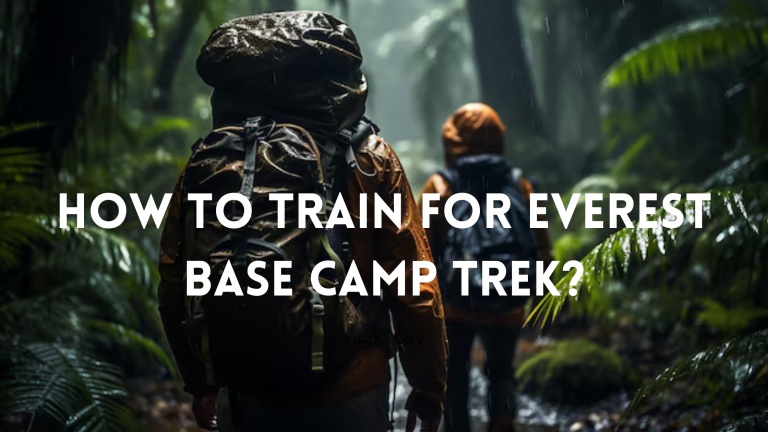
How To Train For Everest Base Camp Trek
Everest Base Camp Trek is a tough trek, both physically and mentally. The thin air, rugged terrain and the distance you will cover make it one of the toughest treks in the Himalayas, but it is not like a marathon up the world’s tallest mountain. It is not far beyond the ability of most people […]
-
A Beginner’s Guide to Everest Base Camp Trek
This beginner’s guide to Everest Base Camp is designed to help you plan better for Everest Base Camp Trek. When you plan for an epic trip like Everest Base Camp, you might want to dive into the internet and social media to get insight on how to prepare for the trek. But you are likely […]

Altitude Sickness: What Every Trekker Should Know
Signs and Symptoms: How to Recognize Altitude Sickness Early
If you’re planning to trek in Nepal’s breathtaking mountains, one thing you don’t want to ignore is altitude sickness. This sneaky condition can turn your dream trek into a bit of a nightmare if you’re not prepared. But don’t worry—it’s easier to recognize than you think! Let’s break it down so you can keep climbing confidently.

1. What Exactly Is Altitude Sickness?
Altitude sickness, or acute mountain sickness (AMS), is your body’s way of saying, “Hey, what’s up with all this thin air?” It happens when you ascend to high elevations too quickly, giving your body little time to adapt to reduced oxygen levels. While it can sound scary, recognizing it early is key—and it’s totally manageable if you take the right steps.
The condition often starts with mild symptoms like headaches, dizziness, or feeling unusually tired. You might think it’s just the exhaustion from trekking, but trust me, your body could be dropping hints. If you find yourself struggling to catch your breath while resting or feeling like you’ve run a marathon after just a short hike, take notice! These are red flags that your body is working overtime to adjust to the altitude.
2. Common Symptoms: Know What to Look Out For
One of the first signs of altitude sickness is a pounding headache that just doesn’t seem to go away. It’s not your typical “I-need-a-coffee” headache—it feels heavier and can make focusing tough. You might also feel nauseous or lose your appetite, even if you were just daydreaming about that warm dal bhat at the last teahouse.
Dizziness or feeling lightheaded is another common symptom, and it can feel like the world’s decided to spin without your permission. If you find yourself wobbling on those rocky trails or grabbing onto your trekking pole for dear life, pay attention. It’s not just the tough trail; your body is trying to tell you something.
One more subtle clue? A strange shortness of breath. Sure, the trek might be challenging, but if you’re gasping for air even while standing still, you need to take this seriously. And don’t ignore fatigue—it’s normal to feel tired after hiking, but if you’re unusually drained, it might not just be the steep incline; your body could be craving oxygen.
3. When Symptoms Get Serious
Most cases of altitude sickness are mild and pass with rest, hydration, and slower ascents, but things can get serious if ignored. If you experience severe symptoms like confusion, difficulty walking straight, or extreme breathlessness, it’s time to act fast. This could indicate more advanced forms of altitude sickness, like high-altitude pulmonary edema (HAPE) or cerebral edema (HACE).
HAPE is when fluid builds up in your lungs, making breathing even harder, while HACE involves swelling in the brain. These are rare but serious conditions, and if you or someone in your group starts showing these signs, immediate descent is non-negotiable. Trust us, no mountain view is worth risking your health for!
4. Your Best Defense: Stay Vigilant
The good news? Altitude sickness is preventable, and catching it early makes all the difference. Always listen to your body—it’s smarter than you think. If you feel off, don’t push yourself to keep going “just a little further.” Your trek is a marathon, not a sprint.
Take regular breaks, stay hydrated, and remember to fuel up with nutritious snacks along the way. And don’t hesitate to share how you’re feeling with your guide or group members. Trekking in Nepal isn’t a solo show—your team is there to support you.
Tips for Proper Acclimatization While Trekking
Trekking in the high altitudes of Nepal is an adventure of a lifetime, but proper acclimatization is the secret sauce to making it truly enjoyable. Without it, those gorgeous Himalayan views can quickly turn into dizzying nightmares. But don’t worry—it’s not rocket science! Here’s how you can give your body the VIP treatment it needs to handle the heights like a pro.
1. Climb High, Sleep Low
This is the golden rule of acclimatization, and it’s as simple as it sounds. While trekking, you’ll want to gain altitude during the day, perhaps by climbing a little higher than your overnight stop, and then descend to sleep at a lower altitude. This gives your body time to adjust to thinner air while still letting you push your limits a bit.
Think of it as training your lungs for their starring role in your trek. If your itinerary has a built-in “acclimatization day,” use it wisely—hike up to a viewpoint, snap some photos, and head back down to rest. It’s a great excuse to explore and soak in the scenery without overdoing it.
2. Hydrate Like It’s Your Job
Water is your best trekking buddy—seriously, don’t leave your bottle behind! Staying hydrated helps your body adjust to high altitudes more effectively. Aim to drink at least 3–4 liters a day, even if you’re not feeling thirsty.
Here’s the thing: the higher you go, the drier the air, which means you lose water faster than usual. Don’t wait for your lips to turn into sandpaper to start sipping. Bonus tip? Skip the alcohol and caffeine, or at least go easy on them. As tempting as that celebratory beer at a teahouse might be, it can dehydrate you and mess with your acclimatization.
3. Go Slow and Steady
This isn’t a race, so let the mountain guide your pace. Trekking too quickly to high altitudes is one of the fastest ways to invite altitude sickness into your plans. Instead, take it slow and savor every step.
Your body needs time to adapt, and pushing yourself too hard can lead to exhaustion or worse. Breaks aren’t just for catching your breath—they’re opportunities to enjoy the breathtaking landscapes around you. Plus, let’s be honest, who wouldn’t want to linger a little longer with views of snow-capped peaks and prayer flags fluttering in the wind?
4. Listen to Your Body
Nobody knows your body better than you do, so tune in to what it’s telling you. Feel a headache creeping in? Notice some dizziness? Don’t ignore these signs—they’re your body’s way of asking for a timeout.
Take a rest, hydrate, and don’t be afraid to share how you’re feeling with your guide or group. The sooner you address symptoms, the better your chances of avoiding serious issues. Remember, there’s no shame in turning back or adjusting your plans. The mountains will always be there, but your health comes first.
5. Fuel Up With Nutritious Meals
When you’re trekking at high altitudes, your body burns energy faster, so keeping it fueled is essential. Meals rich in carbohydrates are your best bet since they provide a quick energy boost and are easier to digest at altitude.
Luckily, Nepal’s teahouses serve up some amazing trekking-friendly food like dal bhat, which is both nutritious and delicious. Don’t skip meals, even if your appetite dips—it’s your body’s fuel for the day. Throw in some snacks like nuts, chocolate, or energy bars to munch on the trail. Trust me, a bite of chocolate at 4,000 meters feels like a hug for your soul.
6. Respect Rest Days
If your trek itinerary includes acclimatization days, don’t think of them as “lazy days.” These are your body’s gift to itself! Use them to explore nearby villages, take short hikes, or simply relax with a good book and some tea.
Acclimatization days help your body adjust gradually and prevent altitude sickness from creeping up on you. Plus, they’re a great opportunity to connect with locals, soak in the culture, and recharge your energy for the challenges ahead.
Hydration and Nutrition for High-Altitude Adventures
When you’re trekking at high altitudes, your body needs more care than usual. Staying hydrated and fueling up with the right nutrition is the magic formula to keep you going strong. Think of it as prepping your body for its most epic performance, surrounded by breathtaking views that are totally worth the effort. Let’s break it down into simple, actionable tips that will have you conquering those peaks with a smile on your face.
1. Drink Up: Your Hydration Plan
At high altitudes, your body loses water faster than it does at sea level, even when you’re not breaking a sweat. The cold, dry air and increased breathing rate dehydrate you faster than you might expect. So, the golden rule? Drink, drink, and then drink some more! Aim for at least 3–4 liters of water a day.
It’s not just about gulping water at once—it’s about consistent sipping throughout the day. Carry a reusable water bottle and make it your constant companion. Feeling fancy? Add some electrolyte powders or hydration tablets to your water to replace the salts and minerals you lose while trekking. These will help keep you energized and prevent pesky cramps. Oh, and avoid alcohol or too much caffeine—they might seem tempting, but they’ll only dehydrate you more. Save the celebratory beer for when you’re back at base camp!
2. Carb-Load Like a Pro
When you’re hiking at high altitudes, your body becomes a calorie-burning machine. The increased physical activity combined with the energy it takes to adjust to the altitude means you’ll need extra fuel. Carbohydrates are your best friend here—they’re easy to digest and give you quick energy to keep putting one foot in front of the other.
Good news: trekking in Nepal means you’ll have access to carb-packed dishes like dal bhat, noodle soups, and momos. These local delights are both delicious and exactly what your body craves. Pack some lightweight snacks like trail mix, energy bars, or dried fruits for munching on the go. And don’t feel guilty about indulging in a little chocolate—it’s an instant morale booster and a solid energy kick!
3. Listen to Your Hunger Signals
Altitude can play tricks on your appetite. While some people feel ravenous, others might lose their hunger altogether. Either way, you need to eat regularly to keep your energy levels steady. Even if your stomach isn’t growling, make sure to fuel up during meal breaks.
Start your day with a hearty breakfast—oatmeal, eggs, or even pancakes are great choices to kick off your trek. For lunch and dinner, opt for warm, comforting meals that are easy to digest. Soups are particularly great because they’re hydrating and packed with nutrients. And don’t forget to treat yourself! A sugary snack now and then can be the perfect pick-me-up after a tough climb.
4. Stay Balanced: Nutrition Beyond Carbs
While carbs are your trekking MVP, you can’t ignore the importance of proteins and healthy fats. Protein helps with muscle recovery, which is crucial after a day of challenging trails, while fats provide long-lasting energy.
If you’re a meat eater, savor dishes like chicken curry or other meat (yes, that’s a thing!). But we strictly suggest to avoid meats as they might upset your stomach. But there is no need to worry—lentils, beans, and eggs offer plenty of protein. Carry some nuts or seeds for a dose of healthy fats on the go. The goal is to keep your diet balanced so your body gets all the nutrients it needs to thrive at altitude.
5. Hydration and Nutrition Work Together
It’s easy to focus on one and forget the other, but hydration and nutrition go hand in hand when it comes to high-altitude success. If you’re eating salty snacks, for example, you’ll need to drink even more water to stay balanced. Similarly, staying hydrated helps your body digest and absorb the nutrients from your meals more effectively.
A pro tip? Start your hydration and nutrition game before you even hit the trail. Hydrate well in the days leading up to your trek, and eat balanced meals to fuel your body in advance. Think of it as charging your battery before the adventure begins.
Emergency Preparedness: What to Do if It Strikes
Trekking through the mountains is all fun and adventure—until an emergency sneaks up on you. While no one likes to imagine worst-case scenarios, being prepared can turn a potential disaster into just a small hiccup on your epic journey. Whether it’s altitude sickness, unexpected weather, or a sudden injury, having a plan in place is your golden ticket to staying calm and taking control. Let’s dive into what you need to know when emergencies strike in the great outdoors.
1. Stay Calm: The Golden Rule
The first thing to do in any emergency is to stay calm. Sounds cliché, right? But trust me, panic helps no one. When something goes wrong on the trail, take a moment to breathe deeply and assess the situation. A clear head is your most powerful tool for problem-solving.
If you’re traveling with a guide, communicate openly. Don’t freak out—he will handle the situation. Solo traveler? No worries—pause, think, and remind yourself that you’ve got the skills and tools to handle this. Remember, every trekker has moments like these, and you’re not alone in facing them.
2. Altitude Sickness: Spot It Early
The air gets thinner as you climb, and your body might not love the change. Altitude sickness, or Acute Mountain Sickness (AMS), can sneak up on anyone, no matter how fit you are. Symptoms include headaches, nausea, dizziness, and feeling like you’ve suddenly aged a hundred years. If you notice these signs, don’t push through it.
The best remedy? Descend to a lower altitude as soon as possible. Even dropping 500 meters can work wonders. While you’re at it, hydrate like a champion, and if you’ve packed altitude sickness meds like Diamox, now’s the time to use them. If symptoms worsen or you experience confusion or chest pain, treat it as a serious emergency. Get help immediately—your guides or locals will know the quickest way to a medical facility.
3. Unexpected Weather: Prepare for the Worst
The mountains love to surprise you with weather that changes faster than you can say “cloud cover.” One moment it’s sunny; the next, you’re caught in a downpour, snowstorm, or bone-chilling winds. Having the right gear is your best line of defense. A waterproof jacket, thermal layers, and sturdy boots aren’t just nice to have—they’re lifesavers.
If bad weather strikes while you’re trekking, find shelter. It could be a teahouse, a cave, or even huddling under a tarp. Don’t keep pushing forward in hopes it’ll clear up; sometimes, patience is the safest choice. And always, always pack an emergency blanket—it’s lightweight, warm, and worth its weight in gold when temperatures drop unexpectedly.
4. Injuries on the Trail: Quick Fixes and Care
You’re cruising along, taking in the jaw-dropping views, when—bam!—you trip on a rock and twist your ankle. Injuries happen, and they don’t have to ruin your adventure if you know what to do. First things first: carry a well-stocked first-aid kit. Think bandages, antiseptic wipes, painkillers, and a roll of athletic tape.
For minor injuries like cuts or scrapes, clean the wound immediately to avoid infection. For sprains or strains, follow the RICE method: Rest, Ice (or something cold), Compression, and Elevation. If it’s a more serious injury, like a broken bone, immobilize the area and call for help. That’s why trekking with a guide or group is such a great idea—they’ll know how to summon help quickly or arrange for evacuation if needed.
5. Navigation Mishaps: Finding Your Way Back
Getting lost might sound like a nightmare, but it’s easier to deal with than you think—as long as you stay calm. If you realize you’ve wandered off the trail, stop and assess. Don’t keep wandering aimlessly; instead, try to backtrack to a known landmark.
This is where preparation pays off. Always carry a map or compass, and know how to use them. If you’re in a group, stick together—splitting up makes it harder for rescuers to find you. Worst-case scenario, find a safe spot to stay put, signal for help, and wait. Bright-colored clothing or a whistle can make a huge difference in getting noticed.
6. Emergency Contacts: Your Lifeline
Before you even set foot on the trail, make sure you’ve got your emergency contacts sorted. Share your itinerary with someone back home and keep a list of local emergency numbers handy. If you’re trekking with a guide, they’ll usually take the lead in contacting help, but it never hurts to be prepared yourself.
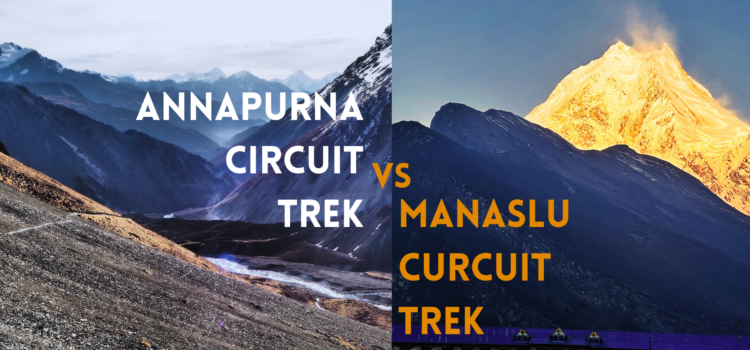
Manaslu Circuit Trek Vs Annapurna Ciruit Trek
Differences and Similarities between Annapurna Circut Trek and Manaslu Circuit Tek
When it comes to trekking in Nepal, you might come across a galaxy of choices. With towering peaks standing to its northern highlands, including eight of the world’s fourteen peaks over 8,000 meters, Nepal boasts a wide range of trekking routes that not only highlight its impressive mountains but also its rich cultural heritage and biodiversity.

Among them are the Annapurna Circuit Trek and the Manaslu Circuit Trek, both highly sought after. Since each trek circumambulates an 8,000m peak, crosses the high mountain passes, unravels the most diverse landscapes, cultures and terrains, choosing one over the other can be a tough job. We will try to figure out the key differences and the similarities between these two iconic trekking routes.
Lets find out the key differences and the similarities betweeen these two iconic trekkings in the Himalayas
How Busy is Annapurna Circuit Trek vs Manaslu Circuit Trek?
Manaslu Area was opened to foreigners in the early 90s only so it is not as popular as Annapurna Circuit trek. Even though it is open to foreigners, Manaslu Circuit trek still remains a restricted area, forbidding solo trekking. This is one of the reasons why Manaslu Circuit Trek is less crowded and sought after trekking route in Nepal. There are still a large number of trekkers who do not know about Manaslu area. When it comes to trekking in Nepal, people usually look for Everest Base Camp Trek. But Manaslu Circuit trek still remains behind the curtain, keeping away from crowds. Manaslu area is not commercialized and has still retained its authenticity, ancientness and charm. Even though the road is being built at the lower valley, the trails are still intact and unaffected by roads. For the first day, you intermittently follow the roads but from the second day, you walk on pure trails till the last day of the trekking. Tea houses are never overcrowded providing a cozy and rustic atmosphere. Best off-the-beaten-path treks
Annapurna Circuit is another very popular trekking route in Nepal, making it one of most sought after trekking destinations in Nepal. With its diverse landscapes, unique geographical features, ancient culture and stunning mountain view, Annapurna Circuit Trek is one of the best trekking routes in the entire Himalayan Belt. Due to its flexible policy on solo trekking, easily accessible routes, navigable trails, and abundance of information available on the internet, Annapurna Circuit Trek is considered a backpacker’s haven. However, this has led to an influx of tourists on this route, making it one of the busiest trekking routes in Nepal. Moreover, with the road networks replacing approximately 30% of the trails, the route has lost its aura. Thus it may not be an ideal destination for those who want to trek off the beaten track.
Starting Ending Point of Annapurna Circuit Vs Manaslu Circuit Trek
Manaslu Circuit Trek starts from Soti Khola, a small village in Gorkha District of Nepal. Walking around the foothills of Mt. Manaslu, the trail ends in Gowa, a village near Dharapani, the starting point of Annapurna Circuit Trekking.
Annapurna Circuit Trek starts from Dharapani, where Manaslu Circuit Trek concludes. It ends in Jomsom, a town located north of Pokhara City.

Annapurna Circuit Trek VS Manaslu Circuit Trek Route
Manaslu Circuit trek navigates the Budhi Gandaki River Valley, until it crosses Larkya La Pass, then continues following Marshyangdi River valley after meeting Annapurna Circuit Trek at Dharapani. Drive to Bandipur for an overnight halt before continuing the journey back to Kathmandu.
The trek starts from Machha Khola, located 160 km north-west of Kathmandu. The road heads west of Kathmandu on black topped road until Abu Khaireni, from where it veers towards the north and passes through Gorkha Bazar, the headquarters of Gorkha District.
From there, the road descends to Arughat Bazar and follows the Budhi Gandaki River upstream. From Machha Khola, we continue along the trekking trail, occasionally meeting the roads. The trail negotiates Budhi Gandaki River, crossing it a couple of times, and passes through the villages of Jagat, Philim, Deng. From Deng, the route bends westward, going through the village of Lho, Shyala, Samagaon. The trail veers towards the north again while ascending from Samagaon to Samdo. Cross the Larkya La Pass and descend to Bimthang in Annapurna Conservation Area. Walking down the forested trail spend your last night in the mountain in the village of Gowa. Hop into the jeep and meet the Annapurna Circuit route at Dharapani. Driving south from Dharapni, the road meets the highway to Pokhara at Dumre, from where it branches off and ascends to Bandipur. After some relaxation in Bandipur, drive back to Kathmandu.

Annapurna Circuit Trek navigates the Marshandi River Valley, crosses Thorong La Pass, and follows Kali Gandaki Valley on the other side of the pass. The trail ends in Jomsom, followed by a flight to Pokhara. The trip concludes with a road trip back to Kathmandu.
The road to Machha Khola, from where the trip starts, heads westward along the Prithvi Highway. At Dumre, the road branches off to the north and concludes in Besisahar, the district headquarters of Lamjung District and the starting point of the Annapurna Circuit Trek. The road becomes rough and bumpy as we drive on a local 4Wd jeep. The road ascends alongside the Marshyangdi River, passing by the villages of Bhulbhule, Jagat and Syange. Spend your first night in Tal, which is located across the Marshyangdi River. Start walking from Tal, but mostly on the road through the villages of Dharapani, Bagarchhap, and Dhanakyu all the way to Chame. Continue along the road until you reach Pisang, from where you will take a walking trail to Ngawal, and further to Manang. Spend two nights in Manang then take a side trail to Tilicho Lake. After visiting Tilicho Lake, we descend and rejoin the main Annapurna Circuit trek route at Yak Kharka. Spend a night at Thorong Phedi before crossing Thorong La Pass. After crossing the pass, the route descends to Muktinath and follows Kali Gandaki River Valley until reaching Jomsom. Take the flight to Pokhara from Jomsom and spend a night there. Take a public tourist bus back to Kathmandu which takes around 7/8 hrs. Spend a relaxing evening in Kathmandu and drive to the airport the next day as per your flight itinerary.
Length of Annapurna Circuit Trek VS Manaslu Circuit Trek

The Lengths of the Manaslu Circuit Trek and the Annapurna Circuit trek are equal, each totaling 17 days. Though the number of trekking/walking days varies by one day, as the Manaslu Circuit Trek spans 11 days and the Annapurna Circuit Trek spans 12 days. The remaining days are allocated for drive in/out and the internal flights.
But at the same time, both trekking routes have wide ranges of options for customization.
The Manaslu Circuit Trek can be combined with the Tsum Valley and extended further to Pokhara, either with or without the Tsum Valley.
Annapurna Circuit Trek can be done without a side trip to Tilicho Lake, cutting two days off the standard itinerary. For the hardcore hikers, Annapurna Circuit Trek can also be extended to Poon Hill Circuit Trek, and sometimes all the way to Annapurna Base Camp.
How Hard is Manaslu Circuit Trek vs Annapurna Circuit trek?

The difficulty level of the Manaslu Circuit Trek and the Annapurna Circuit Trek is considered moderate to difficult trekking routes due to their length, distance, terrain and the elevation profile.
Manaslu Circuit Trek can be slightly more difficult than the Annapurna Circuit Trek due to its remoteness, and the distance one should cover on the first two days. The Larkya La Pass of Manaslu Circuit Trek is relatively easier than the Thorong La Pass of Annapurna Circuit.
Annapurna Circuit is not as remote as Manaslu Circuit trek. The large number of tea houses and their standards are higher than those of Manaslu. The trails are easily navigable. The section between Sri Kharka and Tilicho Base Camp can be a little tough as you walk on scree with steep slope. Otherwise the trails are not technically difficult and do not require any skill either.

7 Beginner-Friendly Trekkings in Nepal
The trekking routes flourished under the soaring peaks in the northern skyline have become the first choice for many hard core hikers and trekkers. But because of Nepal’s diverse topography and terrain, it also generoursly offer beginner-friendly trekking options.
First time trekking in Nepal? Keep calm and buy the flight tickets as we have easy hiking trails that perfectly match your feet. Nepal has got many beginner friendly trekking routes that give real hiking experience below the tree line with less gradients and stress to your body and mind.
Here are 7 trekking routes, that we think are the best for beginners.
Mardi Himal Trek

Duration: 5/6 Days
Maximum Elevation: 4500m/14760 ft
Best Time to Trek: March to May and September to October.
Mardi Himal Trek is considered as one of the best beginner-friendly hikes in Annapurna Region because of it’s duration, gentle elevation profile, stunning view and its proximity to the town. After driving for an hour you can start hiking through lush forest and quaint tea houses. The trail mostly follows a ridge that concludes at Mardi Himal base camp. Even though the trek is named after Mardi Himal, Machhapuchre dominates the stage.
Ghorepani-Poonhill Trek

Duration: 5 Days
Maximum Elevation: 3210m/1052 ft
Best Time to Trek: March to May and September to October
Ghorepani Poonhill trek circumambulates a big chunk of hills, while showcasing the mesmerizing views of Annapurna massif, Machhapuchhre and Dhaulagiri range. The route perfectly meets the expectation of those looking for easy treks in Nepal. Due to easy hiking trails, moderate elevation gain, rich Gurung and Poon culture, Ghorepani Poonhill trek is an ideal match for beginners.
Khopra Ridge Trek

Duration:6/7 Days
Maximum Elevation: 3600m/11808 ft
Best Time to Trek: March to May and September to October
Khopra Ridge Trek is the Best Beginner trek in Nepal. Despite being so close to Popular trekking routes like Annapurna Base Camp and Poonhill Trek, the route still remains almost unnoticed. The trek navigates isolated trails and lush forest, culminating in the ascent of Khayar Lake at 4600m (day hike-optional). The views are second to none and the atmosphere is pretty much remote. If you are a beginner trekker and looking for off the beaten path, then Khopra Ridge is for you.
Langtang Valley Trek

Duration: 9 Day
Maximum Elevation Gain: 3870m
Best Time to Trek: March to May and September to October
Langtang Valley Trek is one of the nearest trekking destinations to Kathmandu. Whether you are experienced hiker or a first time trekking in Nepal, Langtang valley trek suits both. The track to Langtang valley weaves through vibrant forest, river valleys, pastures and secluded tea houses, ultimately leading you to the Kyanjin Gomba. It is also a family-friendly trekking due to the smooth terrain and moderate elevation. If you want to extend this trek then you might want to consider Langtang Valley and Gosaikunda Trek.
Pikey Peak Trek

Duration: 7 Days
Maximum Elevatiion Gain: 4100m
Best Time to Trek: March to May and September to October
Trekking in the foothills of the Himalayas for the first time? No worries we have the Pikey Peak Trek for you, which is popular among the beginners and novice trekkers. Despite being an easy hiking trail, the views you will have and the culture you will observe are beyond your imagination. It’s gentle terrain, moderate height and short duration, the route is best for beginners and those with short vacations. If you are interested in doing Everest Base Camp Trek and Gokyo Valley Trek to see mount Everest but are not a avid trekker, then this is the best alternative for you.It showcases Mt. Everest and other 8k peaks in the same frame.
Panchase Trek

Duration: 3 Days
Maximum Elevatiion Gain: 2483m
Best Time to Trek: March to May and September to October
One of the easiest trekking routes close to Pokhara. The route follows the trail around the ridgeline that surrounds Pokhara city with stunning views of Machhapuchhre and Annapurna. A quick escape from the hustle and bustle and best match for beginners. Walk past the world peace pagoda and the large Mahadev temple, through lush forest and villages. Ease your muscles and mind, hike below 2000m and stay and eat with locals.
But don’t remain under any illusion that beginner-friendly trekking in Nepal is like walking in a park. Even though those routes are designed for novice trekkers, you still cover 7/8 km per day, with moderate to steep ascent and descents. the only factors that make these treks easy is the length and moderate altitude. We advise some trainings before coming to Nepal, which benifit you in many

How To Train For Everest Base Camp Trek
Everest Base Camp Trek is a tough trek, both physically and mentally. The thin air, rugged terrain and the distance you will cover make it one of the toughest treks in the Himalayas, but it is not like a marathon up the world’s tallest mountain. It is not far beyond the ability of most people either. With the proper training, right mindset, well-maintained pace and experienced team, you can successfully scale the base Camp.

Training anywhere between 8-12 weeks should be enough for a 13 days hike to Everest Base Camp. Try to diversify your training and don’t stick with a particular training and routine. Which will help you build up to being able to walk 5-8 hours almost everyday. Your training should generally involve cardio, leg strength, nutrition and hikings at a regular interval.
Do I need to train for Everest Base Camp Trek even if I lead an active life?
It depends on what kind of activity you are engaged in. Trekking to Everest Base Camp is all about physical and mental endurance. We have planned a particular training routine which is tested over the years with impressive result. Generally speaking, if you have a physically active lifestyle, 8 weeks training will be sufficient. Otherwise, we suggest starting training 12 weeks before the commencement of the trekking. To get an insight on how difficult is Everest Base Camp Trek, read this.
When should I start training for Everest Base Camp Trekking?

If you are physically active and train on a regular basis, you can start training two months before the trekking and focus on endurance, strength, diet and gears. If you don’t lead an active life then you should start training at least three months before the trekking. We have explained about training routines in detail below.
What should I consider before starting to train?
Know your body and physics before starting the training. Some of the training advised below may not be suitable for your body. So consult with your doctor, if you have any physical constraint and limitations. You can also hire a personal trainer, if you want to be guided by professionals.
What should be my mantra for training?
Consistency and discipline. Stick to the routine and the plan, and don’t break it at any cost.
Everest Base Camp trekking training plan.
We have classified the Training to Everest Base Camp into the following.
1. Leg Strength training

Leg Strength training induces your muscular contractions. Your leg muscles are the ones that endure the most strain, so it is important to have strong and conditioned leg muscles. Some of the effective trainings for strength are:
- Lunges.
- Squats.
- Top Toes.
- Wall Sitting.
- Deadlifts
- Leg press
- Leg Curls
2. Cardiovascular Training
Cardiovascular exercises are beneficial to increase your breathing and heart rate to fuel your body. And as a result, your body is likely to work well even on less oxygen. We recommend this training 3 times a week. Some of the effective aerobic trainings are:
- Running
- Box jumping
- Jumping jacks
- Burpees
- Jumping squats
- Swimming
- Rowing
- Swimming
3. Aerobics Workout

To get your heart rate up, aerobic exercise is beneficial. It helps body work well on less oxygen
- Stair running
- Box jumping
- Jumping jacks
- Burpees
- Jumping squats
4. Training Hikes

Like strength and cardio training, hiking is equally essential. We advise one or two short hikes during the week and one or two longer hikes during the weekend. Try to hike in the terrain as close to the Everest base camp as possible. You can try the following routine to diversify your training.
- Steep inclines
- Undulating trails
- Very cold condition
5. Hike to altitude
Everest Base Camp trek involves significant elevation gain. So hiking to the altitude, if you have the opportunity, will benefit you a lot. But if this is not possible for you, you can do it at sea level. You will hike at the elevation with your muscles getting oxygen 30-50% less than what it gets at sea level, so your muscles get tired in the mountains quickly. To mitigate this, you can hike at the places you live with as much weight as possible so that your muscles get used to working normally at low air pressure.
6. Hiking Alternatives
We understand it is not always possible for everyone to find places to train outdoors. No problems, you can go for alternatives. You can walk up and down on staircases, instead of using elevators. You can also use treadmills or run back and forth to work instead of driving.
7. Gears

It is good to buy your trekking gear and get familiar with them, especially trekking boots, socks and a backpack. Check our packing list in case you need the guideline.
- Trekking Boots: While buying the trekking boots make sure they are comfortable with a finger space left. It should be waterproof and breathable too. Do not hesitate to exchange them if they are not comfortable.
- Trekking Poles: Even the poles are considered as an optional gear, they are really helpful at higher altitude. It helps with stability and also takes a little strain off the legs at times. It could be annoying to use during trekking if you are not used to it, so we suggest using it during training hikings.
- Wear your backpacks: check it fits your torso, and accommodate your gears you will carry during the trekking. Check our packing list here:
Be Social
Try to get connected with the people you are trekking with, Hike with them as far as possible if they live close to you. Being social also helps you during the trip as well as this will help you boost your psychology.
Start training early
We can’t advise enough to plan early as starting it in the few weeks before your trek does not benefit you. Moreover, training in a rush might result in injury too. So start training for Everest Base Camp at least 8-12 weeks before your trek.
Plan your diet too
Planning for well-balanced nutrition that supports high energy levels is very beneficial. If you don’t have dietary restrictions we advise you to consume the diet with rich carbohydrates, protein and healthy fat.
Ease Off before your trek

Let your body rest and relax a week before you arrive in Nepal. However stay active and engage in light training but make sure you don’t injure yourself.
Disclaimer
These are general guidelines only and we do not hold any responsibility for side effects and injuries sustained during the training. Please also consult with your doctor or personal trainer (if you have).
A Beginner’s Guide to Everest Base Camp Trek
This beginner’s guide to Everest Base Camp is designed to help you plan better for Everest Base Camp Trek. When you plan for an epic trip like Everest Base Camp, you might want to dive into the internet and social media to get insight on how to prepare for the trek. But you are likely to end up being confused with hundreds of tips. So it is good to know from the local hosts who have firsthand experience in organizing trekkings to Everest Base Camp. We hope this beginner’s guide will help you to many extents to prepare well

What does the Itinerary look like?
Our itinerary to Everest Base Camp is carefully planned so that it allows you to acclimatize well and accumulate all the experiences. Here is the brief itinerary we have planned.
Day 1: Arrive in Kathmandu
Day 2: Drive to Ramechhap
Day 3: Fly to Lukla and trek to Phakding
Day 4: Trek to Namche
Day 5: Namche acclimatization day
Day 6: Trek to Phortse
Day 7: Trek to Dingboche
Day 8: Dingboche acclimatization day
Day 9: Trek to Lobuche
Day 10: Trek to Everest Base Camp and Gorakshep
Day 11: Trek to Pangboche
Day 12: Trek to Namche
Day 13: Trek to Lukla
Day 14: Fly to Ramchhap and drive back to Kathmandu
Day 15: Departure
For details itinerary, please clink the link http://www.junkiritreks.com/tours/everest-base-camp-trek-15-days/
Where does The Everest Base Camp trek start and end from?

Even though the hike to Everest Base Camp starts and ends in Lukla, the trip itself starts and ends in Kathmandu. Upon your arrival, you will be picked up from the airport and transferred to the hotel. You will have a group meeting at the hotel, followed by dinner the same evening.
The next day you will drive to Ramechhap, where the flights to Lukla are based during the high trekking season. You will stay overnight at the local resort and fly to Lukla the other day. So basically you will fly to Lukla on the third day of your arrival in Kathmandu and fly back on the 14th.
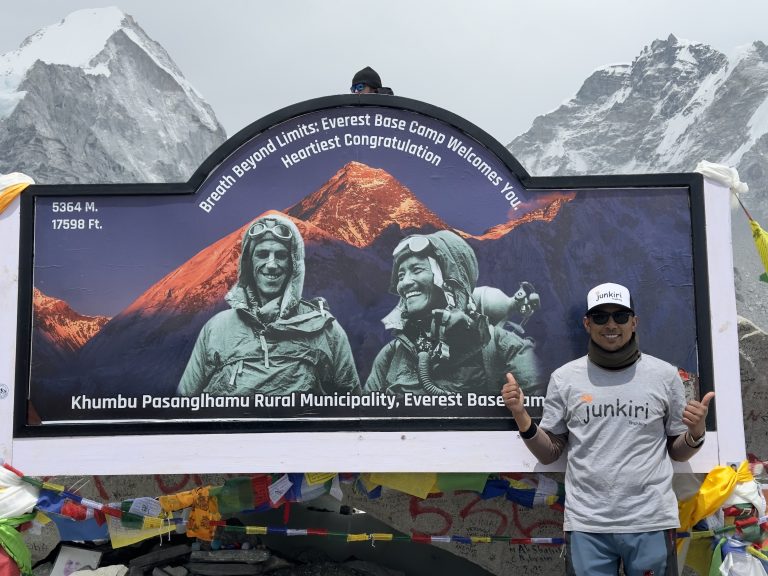
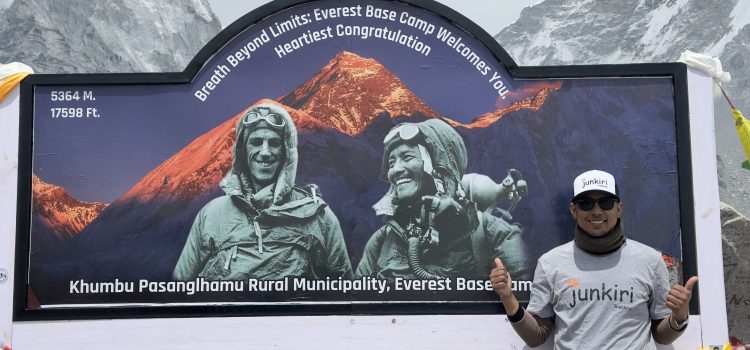
What is the highest point in Everest Base Camp Trek?
The highest point you will hike in Everest Base Camp Trek is the Everest Base Camp itself, which is 5364m/17593ft. However, if you want to hike to Kalapathar, which is optional, you can make it to 5550m.

How difficult is Everest Base Camp Trek?
The difficulty level in outdoor activities is always subjective, as everyone has a different level of fitness and experience. And it applies to Everest Base Camp Trek too. But generally speaking, the trek to Everest Base Camp is a tough trek, for the distance covered, elevation gained and the terrain walked. On average, you will be walking 6- 7 hours every day, with 4/5 kg weight. Some days may stretch up to 12 hours, but that is only when you are returning. While typical elevation gain per day ranges from 4 to 800 meters, the pace will be maintained. There are two rest days allocated for the acclimatization purpose but you will hike to high elevation and sleep low, to mitigate the chances of getting altitude sickness. So basically there are no rest days at all. While the trekking itself is not technical, at certain places the terrain is steep and rugged. So a good level of fitness is required for Everest Base Camp Trek.
What is a typical route for Everest Base Camp Trek?
The route varies depending on preferences, time and ability. The standard itinerary preferred by most of the people is the one via Tengboche Monastery for both to and fro, with the two nights in Namche, and another two in Dingboche. Ours one is a little bit different for both outwards and return.
Day 1: Arrive Kathmandu
Day 2: Drive to Ramechhap
Day 3: Fly to Lukla, trek to Phakding
Day 4: Trek to Namche
Day 5: Acclimatization in Namche
Day 6: Trek to Phortse
Day 7: Trek to Dingboche
Day 8: Acclimatization Dingboche
Day 9: Trek to Lobuche
Day 10: Trek to EBC
Day 11: Trek to Pangboche
Day 12: Trek to Namche
Day 13: Trek to Lukla
Day 14: Fly back to Ramechhap and drive back to Kathmandu
Day 15: Departure
Are there any side trips you can do in Everest Base Camp Trek?
Yes there are a couple of side trips you can do during Everest Base Camp Trek but it requires extra days.
- A side trip to Thame Village:

Thame is a beautiful village west of Namche Bazar at an elevation of 3800m. While the standard Everest Base Camp itinerary involves two nights in Namche with a hike to Everest View Point, a side trip to Thame village requires another one night. The route involves a comfortable hike through pine forest, typical Sherpa villages, towered by Kongde Peak.
- A Side trip to Amadablam Base Camp.

Amadablam Base Camp sits at the elevation of 4600m and boasts the stunning view of Amadablam. The side trip to Ama Dablam Base Camp starts and ends in Pangboche, and takes around 6 hours to complete. The hike starts with a moderate gradient and later becomes steep for most of the way to the base camp. We will return to Pangboche for an overnight stay and head to Dingboche the next day. This side trip helps you acclimatize and offers a great hiking experience.
How fit do I need to be to trek to Everest Base Camp trek?
You don’t need to be in marathon condition but training for 2/3 months benefits you when you hit the trail to Everest Base Camp. We advise doing cardio and leg work for indoor training and a hike at least once in a week for outdoor training. It is also recommended to quit drinking and smoking for 2/3 month time as it is believed to boost your performance in the Everest Base Camp trekking. Since it is advised to avoid meat and cheese during the trekking, it is beneficial to develop the habit of intaking the protein from vegetarian meals.
We have a set guideline about training for Everest Base Camp trek. We suggest you to review it.
Can I trek to Everest Base Camp without a guide and porter?
The honest answer is yes you can. Being one of the most popular trekking routes in the world, the Everest Base Camp Trekking is easily navigable. There are lots of tea houses en route and it should not be challenging to find the accommodation, if you are not traveling in the group. Almost every person you meet along the trail speaks English so you won’t have a hard time communicating and asking for the information.
But having and not having a guide makes a huge difference. Some of the benefits of having a guide are highlighted below.
- Having a trekking guide makes your trekking hassle-free:
Trekking to Everest Base Camp involves lots of logistic preparation, both on and off the scene. From booking a flight ticket, getting through the airport, booking the tea houses, ordering the meals, obtaining the trekking permits to paying the bills, it will be a hassle and exhausting for your body and the mind. But if you have a guide, he will take care of all these things so that you can simply focus on the journey and your well-being.
- You will make local friends
Travelling to a new place with locals is one of the good ways to make local friends. When trekking to Everest Base Camp with a guide and his supporting team, you develop a special bond and make the friendship that lasts forever.
- Having a trekking guide makes your experience immersive.
Trekking to Everest Base Camp with a guide is another great way to learn about local culture and history. You will come across many things that may spark your curiosity in you and with a guide, you can always ask questions. He may have limited knowledge but he can ask locals and experts, and get the answer for you. This way, you will develop an in-depth understanding and appreciation of the local culture, flora, fauna, and mountains.
- Having a trekking guide help you trek safe
Safety comes first when it comes to trekking to Everest Base Camp. While none can avoid the risks involved in trekking to Everest Base Camp, your guide mitigates the risk and casualties by following the safety policies. There will always be someone standing next to you whether you are sick or injured.
How long does it take to scale Everest Base Camp?
Usually, the trek to Everest Base Camp takes anywhere between 12 to 14 days. For a person with average fitness, it takes 12/13 days. However, it can be customized depending on time, age, and fitness. Here are a few options you can choose to customize the length of the Everest Base Camp Trek.
- 12 Days:
If you want to have two acclimatization days with two side trips on the way up but squeeze the returning journey into 3 then you can plan for a 12 days trek.
- 13 Days:
If you want to have two acclimatization days with two side trips on the way up, and want to have 4 days on the return then you can plan for 13 days.
- 13 Days
If you want to have three acclimatization days with three side trips on the way up but squeeze the returning journey into 3 then you can plan for 13 days
- 14 Days:
If you want to have three acclimatization days with three side trips on the way up, and 4 days while returning, then you can plan for 14 Days
When is the best time to trek to Everest Base Camp?

The best time for trekking to Everest Base Camp is the Spring and Autumn season. The spring season starts from March and ends in May. Similarly the Autumn spans from September to November. These two seasons are considered the best time to trek in Everest Base Camp in terms of weather, temperature and visibility. However, if you have to choose between Spring and Autumn, we suggest Autumn over Spring, as it spans longer than the Spring and temperature remains relatively cool. Moreover, the Autumn follows the monsoon season in Nepal, which makes the landscapes greener and more colorful.
The early days of both seasons might be adverse at time though. March can still be very cold, resulting in snow showers at the altitudes, till it’s mid. Similarly, September can be wet, resulting in flight disruptions to Lukla.
But if you want to be more precise and have a big window for dates, we would advise any dates after April and Oct.
Everest Base Camp Packing List
Gears
We suggest you buy your gear early to get used to it and train with what you would wear/carry.
The recommended gear list is based on general practice. However, some items may be unnecessary for you, depending on your body and personal preferences. Go through our comprehensive gear list.
Accommodation in Everest Base Camp Trek.

The accommodation facilities in Everest Base Camp trek range from moderate to basic. The tea houses till Namche are of good quality with clean bed sheets, blankets and clean rooms. However the toilets are not attached. But the higher you go, the fewer tea houses there will be, although the number of trekkers remains almost the same. This can result in the tea houses being busier than you stayed at before so it is good to order the same types of meals instead of varieties so that your meals are served on time. The tea houses above Namche do not have power supply and rely heavily on solar backup. So recharging your high power consuming devices such as power banks can be challenging. The tea houses have a thin partition between rooms, and you can get disturbed by your neighbors so it is good to have earplugs.
At Gorak Shep, the tea houses are below the average standards because of its remoteness. The rooms are congested and dark, and toilet hygiene is not properly maintained.

A Complete Guide to Manaslu Circuit Trek
Manaslu Round Circuit Trek lies to the west-northern part of Nepal in Gorkha District. The trek is named after Mt. Manaslu which is the 8th highest mountain in the world. Manaslu Round Circuit trek encircles Mt. Manaslu and its neighboring mountains such as Naike Peak, Pang Puche, Hiun Chuli, etc.
This ultimate guide to Manaslu Circuit Trek is written to help you plan your trek to Manaslu in a very efficient manner.
Overview
Manaslu Round Circuit Trek lies to the west-northern part of Nepal in Gorkha District. The trek is named after Mt. Manaslu which is the 8th highest mountain in the world. Manaslu Round Circuit trek encircles Mt. Manaslu and its neighboring mountains such as Naike Peak, Pang Puche, Hiun Chuli, etc. The trek starts from Budhi Gandaki River Valley and follows an ancient salt trade route to Tibet. It culminates in the crossing of Larkya La at 5106 m and ends at Annapurna Conservation Area. Manaslu Circuit Trek highlights narrow river valleys, Bhotia culture, ancient settlements, unique terrain, picturesque mountain views, and a formidable pass. The Manaslu Round Trek is graded moderate to hard trekking route, for the distance it covers and the elevation it gains.
How Long is Manaslu Round Trek?
Manaslu Round Circuit Trek lasts anywhere between 13 to 15 Days, depending on your budget, time, and ability. In the past, the trek used to take around 16 days, but due to the road networks, the trek is reduced to 13 days these days. The following itinerary for Manaslu Circuit Trek was tested and reviewed recently.
Day 2: Drive to Machha Khola, overnight
Day 3: Trek to Jagat
Day 4: Trek Deng
Day 5: Trek to Namrung
Day 6: Trek to Shyala
Day 7: Trek to Samagaon via Pung Gyen Monastery
Day 8: Trek to Samdo
Day 9: Samdo Rest
Day 10: Trek to Dharamshala
Day 11: Trek to Bhimtang via Larkya Pass
Day 12: Trek to Gowa
Day 13: Drive to Bandipur or KTM
How Difficult is Manaslu Circuit Trek?
Manaslu Circuit Trek is graded moderate to difficult due to its length, terrain, remoteness, and elevation. On average, you walk for 5-6 hours every day, for 11 days, minimum, covering 10-12 km, roughly. The first three days of the Manaslu Circuit trek are a little bit lengthy but do not gain significant elevation. But some sections are steep and wind through steep cliffside areas and landslide zones. After three days, the trail opens up and goes through wide valleys, and does not present rough terrain. Since the itinerary allows you to acclimate properly, Altitude Sickness is unlikely to bother you. The difficulty level of the Manaslu Circuit trek is mainly determined by the day you cross the pass. While the uphill section of the pass is not steep or long, the other side can be a little bit tough and requires extra attention, if there is snow. So, if you are doing the Manaslu Round Circuit in the late Autumn, Winter, or early Spring, microspikes are a must.
Terrain
Manaslu Round Circuit Trek has a very impressive elevation profile. The trek starts from 800m, ascends to 5106m, and drops to 700m again at the conclusion, featuring some of the most diverse terrains and landscapes. Like many other trekking routes, Manaslu Circuit Trek follows river valleys throughout the trip. The initial part of the trekking meanders through narrow rivers valleys, gorges, and ravines, featuring gradual uphills. After a few days, the valleys start widening a bit and the snow-capped mountains start appearing. From the village of Shyala, the route goes through plateaus and flat meadows. Samagaon is the largest village which is flat and surrounded by mountains. Samdo, the last village before the pass, looks like a valley but it is not as big as Samagaon. The valley starts to narrow again, through meadows and moraine as the trail goes to Dharamshala. The approach to pass involves a walk through a moraine, glacier, and glacial lake. As you walk down from the pass, negotiate the moraine and glaciers, with steep gradients. Bhimtang is a small flat valley, with a small river draining down from the middle of it. Continuing down from Bhimtang, enter into the tree line and start following Dudh Khola. The trek concludes in Besisahar as you take a jeep and drive through the Marshayngdi River Valley.
Culture
Manaslu Circuit Trek features Nubri and Bhotia culture, with rich Tibetan Buddhist Culture. Because of its proximity to Tibet, the people have retained much of the cultures their ancestors brought from there. In the lower part of Manaslu Circuit Trek, you can find Gurung people, who speak different dialects and follow different sects of Buddhism, than those living in higher settlements. As the trail goes to the northernmost area, you will see Bhotia people whose culture, art, and traditions are highly influenced by Tibet. Chortens and Mane Walls appear frequently and monasteries are seen alongside the trails, or in the distance. The structure of houses changes to thatched roofs with prayer flags standing on the top.

Climate
Manaslu Circuit Trek covers four climatic zones, which is very rare in the Himalayas. Here is the climatic profile of the Manaslu Circuit Trek.
- Sub Tropical Zone: The area between Machha Khola, Jagat and Deng, where you hike at an elevation ranging from 800 to 2000m.
- Temperate Zone: The area from Deng, Namrung and to Lhi, where you trek at the elevation between 2000 to 3000m.
- Subalpine Zone: The area between Shyo, Shyala, Smagaon and Samdo, where trek occurs between 3000 m to 4000m.
- Alpine Zone: The area between Samdo, Dharamshala, Larkya La Pass and Lrakya Phedi where the elevation ranges between 4000 m to 5000m
After you start walking down from Phedi the climatic zone starts reversing.
Temperature in Manaslu
The temperature in Manaslu varies depending on the climate and elevation. It also varies when you trek. Below is the temperature profile of Manaslu Circuit Trek.
- Sub Tropical Zone: The area between Machha Khola, Jagat, and Deng, where you hike at an elevation ranging from 800 to 2000m. The temperature remains in the range of 31-35 °C from late spring to early Autumn, and 8-13 °C from late Autumn to early Spring
- Temperate Zone: The area from Deng, Namrung, and Lhi, where you trek at an elevation between 2000 to 3000m. The temperature remains in the range of 22-25 °C from late spring to early Autumn, and -2-6 °C from late Autumn to early Spring.
- Subalpine Zone: The area between Shyo, Shyala, Smagaon, and Samdo, where trek occurs between 3000 m to 4000m. The temperature remains in the range of 6-10 °C from late spring to early Autumn, and -6 to – 12 from late Autumn and early Spring
- Alpine Zone: The area between Samdo, Dharamshala, Larkya La Pass, and Larkya Phedi where the elevation ranges between 4000 m to 5000m. The temperature remains in the range of 1-7 °C from late spring to early Autumn, and -10-20 °C from late Autumn to early Spring
Fauna

Manaslu Circuit Trek lies in the Manaslu Conservation Area and is home to highly endangered animals, including snow leopards and red pandas. Other mammals like Lynx, Asian Black Bear, Himalayan Musk Deer, Blue Sheep, Himalayan Tahr, Goral, and Himalayan Marmots have been identified too. Local Monasteries have made a huge contribution to preserving the animals and birds after they have declared Manaslu as an animal-killing-free zone.
Over 100 bird species of birds have been recorded, including Golden Eagle, Eurasian Golf, Koklass Pheasants, and crimson horned pheasant.
Flora

Manaslu Circuit Trek has three main types of vegetation corresponding to its climatic features. The lower valleys have rich forests of Rhododendrons, Himalayan Blue Pine, and Oak. In the Temperate zone, the vegetation includes the forest of Fir and Rhododendron. In the Subalpine zone, you can see the sparse forest of Birch and Juniper. From 4000m above, the vegetation turned into alpine meadows.
How many trekking permits are required for Manaslu Circuit Trek?
Manaslu Circuit Trek covers two conservation areas and a restricted area. The trekking starts from the Manaslu Conservation Area, enters a restricted area, and ends at the Annapurna Conservation Area. Thus you need to obtain MCAP for the Manaslu Conservation Area, ACAP for the Annapurna Conservation Area, and a special permit for the Restricted Area. To make MCAP and ACAP permits, you have to provide your passport copy and a photo, whereas a special permit for a restricted area requires a passport copy and a valid visa number.
How to Get Permits for Manaslu Circuit Trek?
As Manaslu Circuit Trek belongs to a restricted area, it’s not possible to make the permits individually. As per the law, you have to make the permit through licensed and authorized trekking companies based in Nepal. Once you agree on the cost and itinerary with the company, they will make the permits for you.
How much does the permits for Manaslu Circuit Trek cost?
The cost for Manaslu Circuit Trek stands a little higher than other trekking areas. Manaslu Circuit Trek requires two permits for sanctuary, each costing NRS 3000. Special permits for restricted areas cost between US$70 to US$100 depending on the itinerary you have agreed. The costs for permits are subject to a service charge from the company you book the trek with.
Is Solo Trekking Possible in Manalsu?

Solo Trekking in Manaslu Circuit Trekking has been banned, ever since it was opened for trekkers. You need to be in a group of a minimum of two and hire a trekking guide.
Since Manaslu circuit trekking belongs to restricted area, solo trekking is banned. Unlike Everest, Annapurna and Langtang area, you need to book the trip with one of the local trekking operators, and hire at least a guide. Solo trekking, however is not suggested anywhere you trek in Nepal becusue of safety reasons. Solo Trekking in Manaslu has has controlled the number of trekkers hiking in this area, retaining it’s prestine nature and culture.
Is it possible to shorten the trek?
Yes, it is possible to shorten the trek by a couple of days. As there are road networks built at the starting and ending points of the trek, you can opt to drive on a jeep instead of walking. This can help you reduce the number of trekking days by one to two.
Is Manaslu Circuit Trek Difficult than Annapurna Circuit?
Annapurna Circuit Trek is considered more difficult than Manaslu Circuit Trek, in terms of elevation, length, and terrain. Here are some major points that define the difficulty level of each trek.
- Length: Annapurna Circuit Trek can be done with, or without Tilicho Lake. If you do it with Tilicho Lake, it takes 14 days, and doing it with the lake takes 12 days. But usually, people do it without Lake. Manaslu Circuit Trek on the other side takes 12 days only.
- Elevation: The highest elevation you will reach in Annapurna Circuit is 5400m whereas in Manaslu it’s 5106m.
- Terrain: The terrain in Annapurna Circuit Trek is tougher than Manaslu, as it involves a walk on steep cliffside trails and moraine. Also, the pass in Annapurna Circuit is considered harder than the other one in terms of length and elevation gain.
- Terrain: The terrain in Annapurna Circuit Trek is tougher than Manaslu, as it involves a walk on steep cliffside trails and moraine. Also, the pass in Annapurna Circuit is considered harder than the other one in terms of length and elevation gain.
Meals While the tea houses in Manaslu Circuit Trek have plenty of meals on the menu, the most popular meals served are spaghetti, pasta, momo, noodle soup, and dal bhat. For breakfast, you will be served porridge, egg, bread, tea/coffee, chapati, pancake, etc.
- You will eat breakfast and dinner at the place you stay overnight, whilst lunch during the walk will be provided at another tea house. Vegan foods are also available in Manaslu Circuit Trek but with limited options.
Accommodation

Accommodations are provided on a twin-share basis. Tea houses in Manaslu Circuit Trek are more basic than those in Everest and Annapurna regions. Most toilets are squat-style and outside the tea houses. Electricity is available at most of the tea houses in Manaslu Circuit Trek, except in Dharamshala. It has a couple of hut-style tea houses where rooms are shared between 4-6 people.
Gears
We suggest you buy your gear early to get used to it and train with what you would wear/carry.
The recommended gear list is based on general practice. However, some items may be unnecessary for you, depending on your body and personal preferences.
Body
- 1 set (or at least top) of Base Layer
- 1 set of Thermal Layer (Merino is ideal)
- 1 mid-layer (fleece or similar)
- 1 Set outer layer/Windproof Jacket
- Rain Gear (top and bottom)
- 1 pair lightweight trekking
- Hiking shorts
- 2 trekking t-shirts/shirts-merino is ideal
- Four Season Sleeping bag.
- Four Season Down Jacket.
- 1 pair of liner gloves
- 1 warm wool hat
- 1 buff or similar
- 1 sunhat or similar
- Sleeping bag liner
- Underwear.
Feet
- 1 pair of trekking boots (must be worn in)
- 1 pair of sandals
- 3 pairs of thick socks
- 3 pairs of lighter socks
- Running shoes
Hygiene
- Travel towel
- Sun Cream
- Had Gel
- Moisturizer
- Lip Balm
- Face Wash
- Toilet Paper
- Detergent for manual laundry
- Female Hygiene product
Kits
- Sunglass
- Duffle bag for the porters
- 1-day pack (approx. 35ltr) with waterproof cover.
- 2 x 1 ltr. water bottles or Camelbak
- Head torch
- Water purification tablets/or filter
- Small biodegradable bags
- Mobile charger
- Adaptors: Nepal uses Type D, C, and M
Optional
- Trekking poles
- Personal medication and first aid kit
- Power bank (some tea houses may refuse to charge the power bank device)
- Solar power bank
- Playing Cards
- Book
- 1 small swiss knife
- Maps
- Note and pen
- Thermal Flask
- Permanent Marker
- To/ Finger warmer
- Warm scarf
- Fleece Pants
- Protein Bars
- Supplement glucose tablets
- Knee Cap
- Round Sun Hat
Do I get altitude sickness on Manaslu Circuit Trek?
Altitude Sickness depends on various factors, such as walking pace, acclimatization, rest, sleep, and water and food intake. No matter how fit you are at sea level, your body functions differently at altitude. While we can not control all the factors that contribute to Altitude Sickness, we can follow some basic guidelines to mitigate the chances.
Our Manaslu Circuit Trek itinerary has many opportunities for acclimatization, with two overnights at 3500m elevation with a hike to 4100m, as well as two other nights at 3800m, with a hike to over 5000m. Similarly, our experienced guides monitor your pace and stick to the “slowly slowly” strategy.